What if you could turn murky, questionable water into a safer lifeline with just a few everyday items? Whether you’re deep in the wilderness, trekking far from civilization, or facing an unexpected emergency, a DIY survival water filter can be the difference between dehydration and survival. This simple, ingenious tool—made from a plastic bottle, cotton, charcoal, sand, and gravel—transforms contaminated water into a clearer, safer resource. It’s not a high-tech purifier, but in a pinch, it’s a game-changer. Ready to master a skill that could save your life? Dive into this comprehensive guide to discover how to build this filter, why it works, and essential tips to ensure clean water when it matters most.
🌍 Why a DIY Water Filter Is a Must-Know Skill
Access to clean water is a cornerstone of survival, yet it’s not always guaranteed. In the wild, during natural disasters, or in remote areas, water sources like rivers or puddles can be riddled with dirt, bacteria, and toxins. Dehydration is a real threat, weakening your body and clouding your mind. This DIY water filter, rooted in time-tested filtration principles, uses accessible materials to remove debris and impurities, making water safer to drink in emergencies. While it doesn’t replace professional purifiers, it’s a critical backup when options are limited. Let’s explore the materials, step-by-step process, and science behind this life-saving tool.
🛠️ Materials You’ll Need
This filter requires simple, easy-to-find items, many of which you may already have or can source in nature:
- 🪣 Plastic Bottle: A medium-sized bottle (1–2 liters) works best.
- 🔪 Sharp Knife or Scissors: To cut the bottle.
- 🔥 Soldering Iron or Heated Metal Rod: For making small holes (a heated nail works in a pinch).
- 🧵 Cotton: Clean, unbleached cotton or cloth for fine filtration.
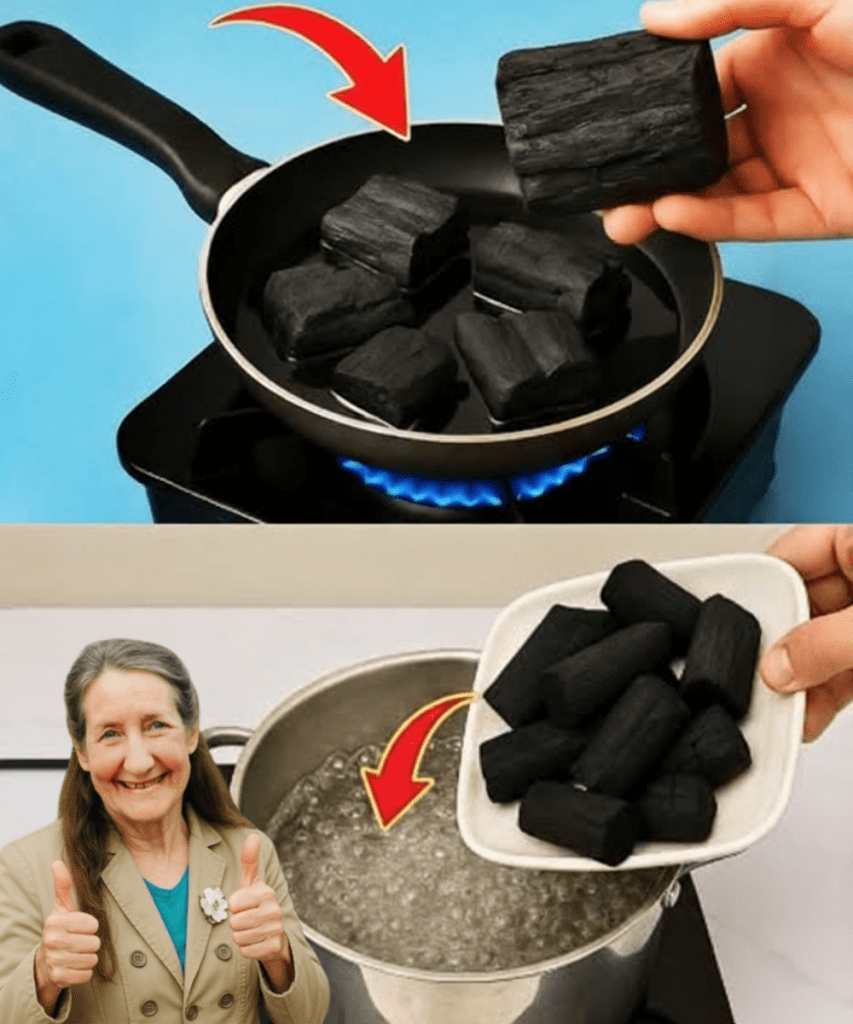
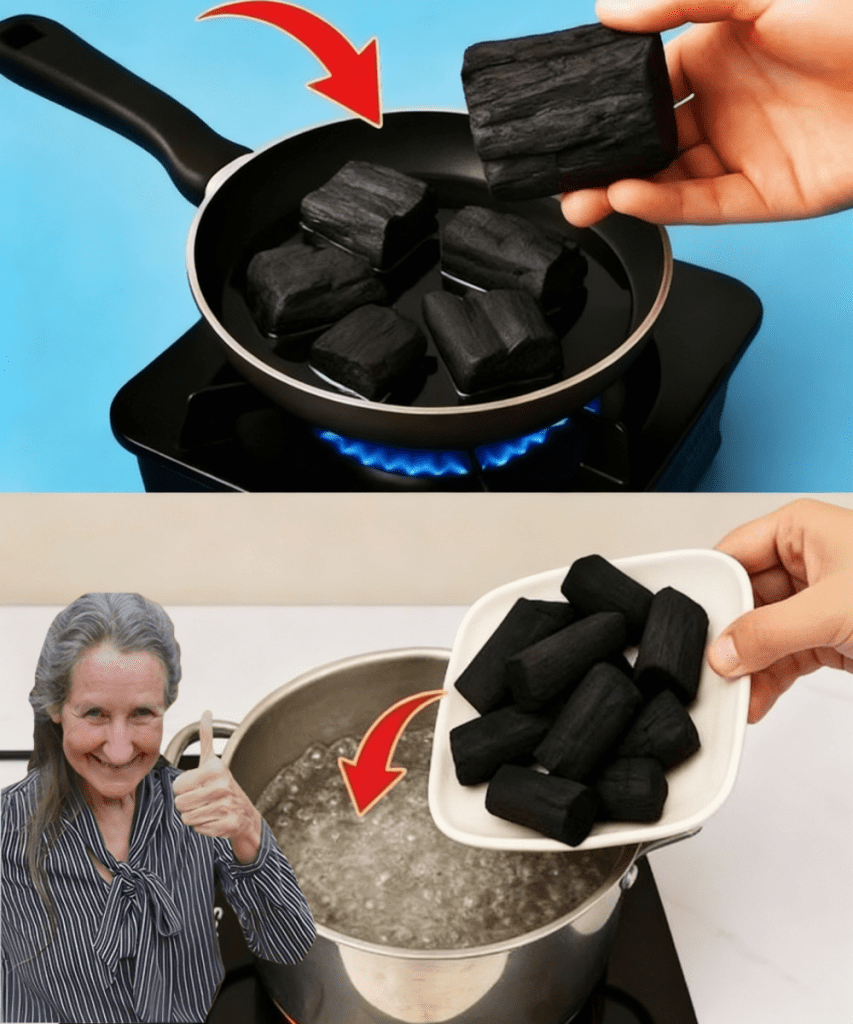
- 🔥 Charcoal: Boiled and dried for safety, ideally from a campfire or natural source.
- 🏜️ Fine, Clean Sand: Washed thoroughly to remove dirt.
- 🪨 Clean Gravel or Small Pebbles: Free of debris for the top layer.
- 🥛 Water Container: A clean vessel to collect filtered water.
These materials mimic nature’s filtration layers, making this filter both practical and effective.
💪 Step-by-Step Guide to Building Your DIY Water Filter
Follow these steps to create a reliable water filter in minutes:
1. Prepare the Bottle
🪣 Set the foundation. Start with a clean plastic bottle—rinse it thoroughly to remove any residue or odors. Using a knife or scissors, cut the bottle in half. The top half (with the cap) will be your filter body, upside down, while the bottom half or a separate container collects the filtered water. A clean bottle ensures no new contaminants are introduced.
2. Create Filtration Holes
🔩 Enable water flow. Use a soldering iron or heated metal rod to make 3–5 small holes in the bottle cap. These holes allow water to drip through slowly, ensuring effective filtration. Keep them small to hold filter layers in place but large enough for steady flow. Optionally, add a few tiny holes along the bottle’s sides near the cap to improve airflow and filtration speed.
3. Build the Filtration Layers
🌿 Mimic nature’s filter. Layering is key to effective filtration. Each layer plays a specific role in trapping debris and impurities:
- Bottom Layer: Cotton
Place a thin layer of clean, unbleached cotton or cloth just above the cap holes. This acts as the final barrier, catching fine particles. Press gently—firm enough to stay in place, loose enough for water to pass through. - Second Layer: Charcoal
Boil charcoal beforehand to remove dust and impurities, then dry and crush into small chunks (not powder). Charcoal’s porous structure adsorbs chemicals, odors, and some toxins. Add a 2–3 cm layer for maximum purification. - Third Layer: Fine Sand
Add a layer of clean, washed sand (about 3–4 cm). This traps smaller particles and ensures even water flow. Rinse sand thoroughly to avoid clouding the water. - Fourth Layer: More Charcoal
Add another 2–3 cm layer of crushed charcoal for extra purification. This second layer enhances the filter’s ability to remove impurities. - Fifth Layer: Fine Sand
Place another 3–4 cm layer of clean sand to stabilize the charcoal and catch finer debris. This ensures consistent filtration. - Top Layer: Gravel or Pebbles
Finish with a 4–5 cm layer of clean gravel or small pebbles. This blocks large debris like leaves or twigs and distributes water evenly across the sand.
4. Assemble the Filter
🔧 Bring it together. Place the top half of the bottle (upside down, with the cap facing downward) into the bottom half or a clean container. Ensure the layers are snug but not overly compressed, allowing water to flow naturally.
5. Test Your Filter
💦 See it in action. Pour murky water slowly over the gravel layer. Watch as it trickles through each layer, emerging clearer in the container below. The filtered water may not be crystal-clear like bottled water, but it should be free of visible debris, sediments, and odors. Repeat filtration for extra clarity if needed.
🔬 Why This Filter Works: The Science Behind the Magic
This DIY filter mimics natural water filtration processes:
- 🪨 Gravel: Traps large debris like leaves, twigs, or dirt.
- 🏜️ Sand: Filters finer particles, ensuring smoother water flow.
- 🔥 Charcoal: Adsorbs chemicals, odors, and some toxins through its porous structure.
- 🧵 Cotton: Polishes the water, catching microscopic sediments.
Together, these layers use physical filtration (trapping particles) and adsorption (binding impurities) to produce cleaner water. While it can’t remove all pathogens like a professional purifier, it significantly reduces contaminants, making water safer in emergencies.
🧘 Tips for Maximum Effectiveness
To ensure your filter performs at its best:
- 🌿 Clean Materials: Wash sand, gravel, and the bottle thoroughly to avoid introducing contaminants.
- 🔥 Prep Charcoal: Boil and dry charcoal to eliminate dust or harmful substances.
- 💧 Filter Twice: For extra clarity, run water through the filter again.
- 📅 Replace Layers: Refresh cotton, sand, and charcoal after heavy use to maintain efficiency.
- 🥛 Store Safely: Collect filtered water in a clean container to prevent recontamination.
⚠️ Safety First: Critical Precautions
This filter is a survival tool, not a complete purifier. Keep these precautions in mind:
- Boil or Purify: Always boil filtered water or use purification tablets before drinking to eliminate pathogens.
- Cleanliness: Ensure all materials are as clean as possible to avoid adding contaminants.
- Temporary Use: This is a short-term solution—seek a safer water source as soon as possible.
- Monitor Quality: If filtered water smells or looks off, discard and rebuild the filter with fresh materials.
Disclaimer: This article is for informational purposes only and does not constitute medical or survival advice. Always prioritize professional water purification methods when available and consult experts in survival situations.
🌟 Why This DIY Filter Is a Survival Essential
The DIY survival water filter is more than a craft—it’s a life-saving skill that empowers you in the face of uncertainty. Whether you’re camping, hiking, or navigating an emergency, this simple tool transforms murky water into a safer resource using items you can find almost anywhere. Affordable, portable, and rooted in nature’s filtration principles, it’s a testament to human ingenuity. Start practicing today, and you’ll be ready to tackle any water-scarce situation with confidence. Why wait to master this essential skill? Build your filter now and take control of your survival!


